B2B Setup Guide — Enable Native Shopify B2B on Vertex
This guide walks you through turning on Shopify's native B2B so Vertex can show volume pricing, MOQ rules, NET payment terms, tax-exempt badges, the multi-location ship-to switcher, B2B catalogs, the sales rep contact card, and every other B2B feature out of the box.
No companion apps. No monthly subscription. No third-party scripts. Every B2B element you see in Vertex comes straight from Shopify's own B2B system — companies, catalogs, price lists, payment terms — all native, all included.
If you skip this guide entirely, Vertex still runs as a polished B2C industrial supply theme. Every B2B element auto-hides when no company buyer is signed in. You can enable B2B later without re-installing the theme.
Why native B2B (and not an app)
Most "B2B Shopify themes" lean on a stack of paid apps — wholesale pricing apps, account-locking apps, NET-terms apps, quote-management apps. Each one adds a monthly fee, an extra block in your theme, a render-blocking script, and a vendor you have to renegotiate with every year.
Vertex takes the opposite approach. Shopify shipped a full native B2B feature set in 2023 (Companies, Catalogs, Volume pricing, Quantity rules, Payment terms, Tax exemption). Vertex was built from day one to render those native features beautifully — no wrappers, no app dependencies.
| What you'd pay for with apps | What Vertex does with native B2B |
|---|---|
| Wholesale pricing app ($29–99/mo) | Shopify Catalog price lists — free, native |
| Volume discount app ($19–49/mo) | Catalog volume tiers — free, native |
| Net-terms app ($29–79/mo) | Company-level payment terms — free, native |
| Quote-management app ($19–59/mo) | Built-in Request a Quote page in Vertex |
| Wholesale-lock app ($14–39/mo) | Hide prices until customer logs in theme setting — built into Vertex |
| Multi-location app ($29–99/mo) | Company locations — free, native |
| Estimated annual savings | $1,800–$4,800/year per store |
Prerequisites
Before you start, confirm:
- Your Shopify plan supports native B2B. That means Shopify Plus, OR Shopify Advanced with the B2B add-on enabled. Native B2B is not available on Basic or Starter plans.
- You have admin access to Settings, Customers, Products, and Themes.
- Vertex is installed and published (or installed as a preview theme). See the installation guide.
- New customer accounts are enabled. B2B requires the new accounts (passwordless), not the legacy classic accounts.
If you're on a lower plan, you can still install Vertex and run it as a B2C-only industrial supply theme today. When your plan upgrades, every B2B feature documented below activates with zero theme work. Just come back to this page.
What you'll set up
| Step | Where in admin | Why |
|---|---|---|
| 1. Enable B2B in Shopify | Settings ▸ Customer accounts ▸ B2B ▸ Manage | Unlocks Companies and Catalogs |
| 2. Create your first company | Customers ▸ Companies ▸ Add company | The buyer organisation record |
| 3. Add company locations | Company page ▸ Locations | Drives the multi-location ship-to switcher |
| 4. Add buyer accounts | Company page ▸ Customers | Assigns the buyer role |
| 5. Create a B2B catalog | Products ▸ Catalogs ▸ Add catalog | Holds B2B prices and quantity rules |
| 6. Add a price list with volume tiers | Catalog page ▸ Price list | Drives the PDP volume pricing table |
| 7. Assign the catalog to the company | Catalog page ▸ Customers | Connects pricing to buyers |
| 8. Set payment terms (NET-30 etc.) | Company page ▸ Payment terms | Drives the NET terms badge |
| 9. (Optional) Mark company tax-exempt | Company page ▸ Tax settings | Drives the tax-exempt badge |
| 10. (Optional) Fill in sales rep details | Customers ▸ Companies ▸ [company] ▸ Metafields | Drives the sales rep contact card |
| 11. Test as a signed-in buyer | Storefront in incognito | Verify every B2B element renders |
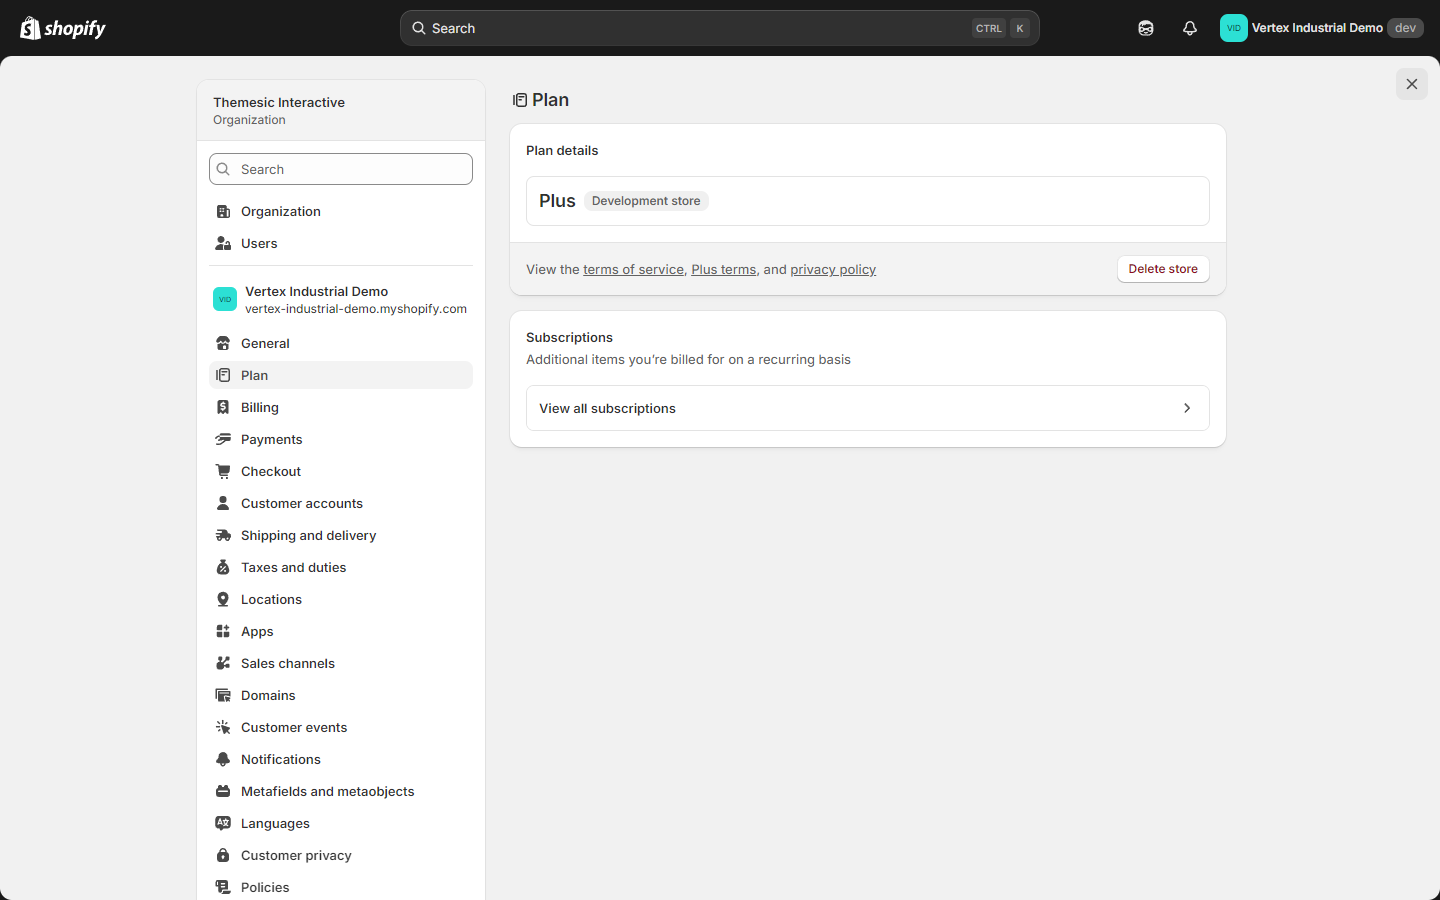
Step 1 — Enable B2B in Shopify
- Open the Shopify admin and click Settings (bottom-left).
- In the left sidebar, click Customer accounts.
- Confirm that New customer accounts is selected. B2B will not work with legacy classic customer accounts.
- Scroll to the B2B section.
- Click Manage.
- Click Enable B2B.
- Confirm the prompt.
Click path: Settings ▸ Customer accounts ▸ B2B ▸ Manage ▸ Enable B2B

Once enabled, two new admin items appear:
- Companies under Customers in the main nav
- Catalogs under Products in the main nav
On Shopify Advanced with the B2B add-on, the Companies and Catalogs nav items can take 2–5 minutes to appear after enabling. If you don't see them right away, refresh the admin page.
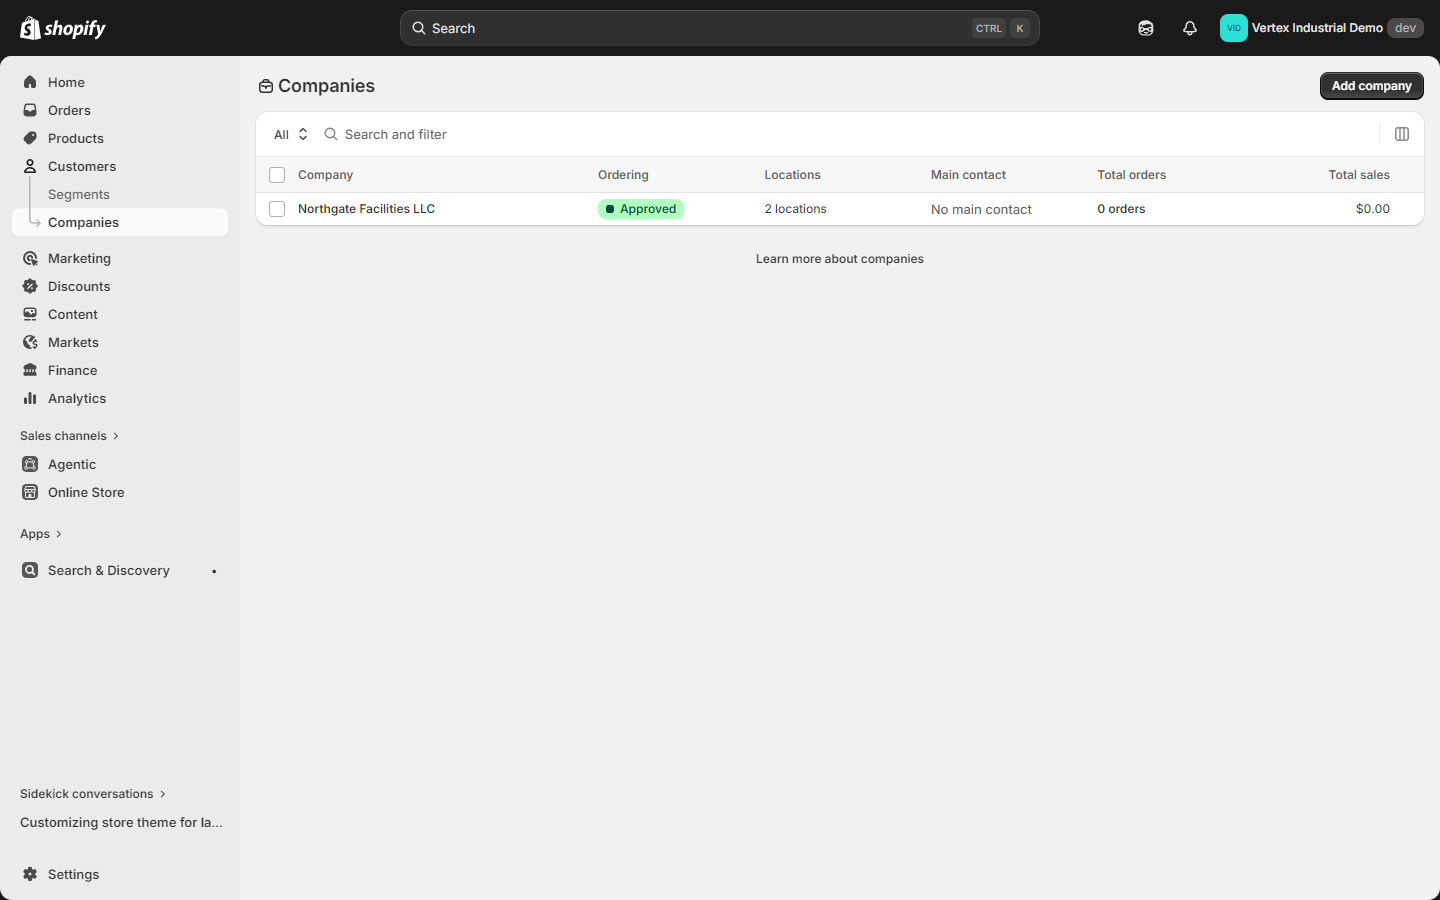
Step 2 — Create your first company
A company represents one buyer organisation — the legal entity that places orders, holds payment terms, and contains one or more shipping locations.
- From the admin sidebar, go to Customers ▸ Companies.
- Click Add company (top right).
- Fill out the Company details:
- Company name — the legal or trading name of the buyer organisation. Example: Northgate Facilities LLC.
- External ID (optional) — your internal account number, if you keep one.
- Note (optional) — internal notes for your team.
- Fill out the Main contact — this is the primary buyer's name and email. They will sign in with this email.
- Click Save.
Click path: Customers ▸ Companies ▸ Add company ▸ Save
Shopify automatically creates the company plus its first location.
Step 3 — Add company locations
Each location is one ship-to address belonging to the company. If your buyer's organisation has multiple regional offices, warehouses, or stores, add each as a separate location. The buyer can switch between them on the storefront using Vertex's ship-to location switcher in the cobalt-blue B2B greeting bar.
- From the company page, scroll to the Locations section.
- Click Add location.
- Fill in:
- Location name — e.g. Cleveland Distribution Center.
- Shipping address — full street address.
- Billing address — same as shipping by default; toggle to enter a separate billing address.
- Save.
- Repeat for each additional location.
Click path: Company page ▸ Locations ▸ Add location ▸ Save
A single-location company is fine. The ship-to switcher only appears in Vertex when the buyer has 2 or more locations. With 1 location, the buyer's default ship-to is used silently.
When the buyer switches between locations using Vertex's switcher (desktop greeting bar or mobile drawer), Shopify keeps their cart and updates the ship-to address, tax context, and price-list scope automatically.
Step 4 — Add buyer accounts (assign roles)
Every customer who should sign in as a B2B buyer for this company needs to be linked to one of its locations.
- From the company page, scroll to Customers (or click the Customers tab).
- Click Add customer.
- Search for an existing customer by email, or click Create new customer to add one inline.
- Pick the location they belong to (one of the locations you created in step 3).
- Pick the role:
- Location admin — can manage the location's address book, see other buyers at the same location, and place orders. Best for the buyer's procurement lead.
- Ordering only — can place orders only. Best for individual buyers who shouldn't modify the company profile.
- Click Save.
Click path: Company page ▸ Customers ▸ Add customer ▸ pick location ▸ pick role ▸ Save
That buyer can now sign in with their normal customer login and Vertex will recognise them as a B2B buyer. The cobalt-blue greeting bar appears with the company name, the assigned catalog applies, the B2B-aware account dashboard renders, and the rep card shows in the header (if filled in).
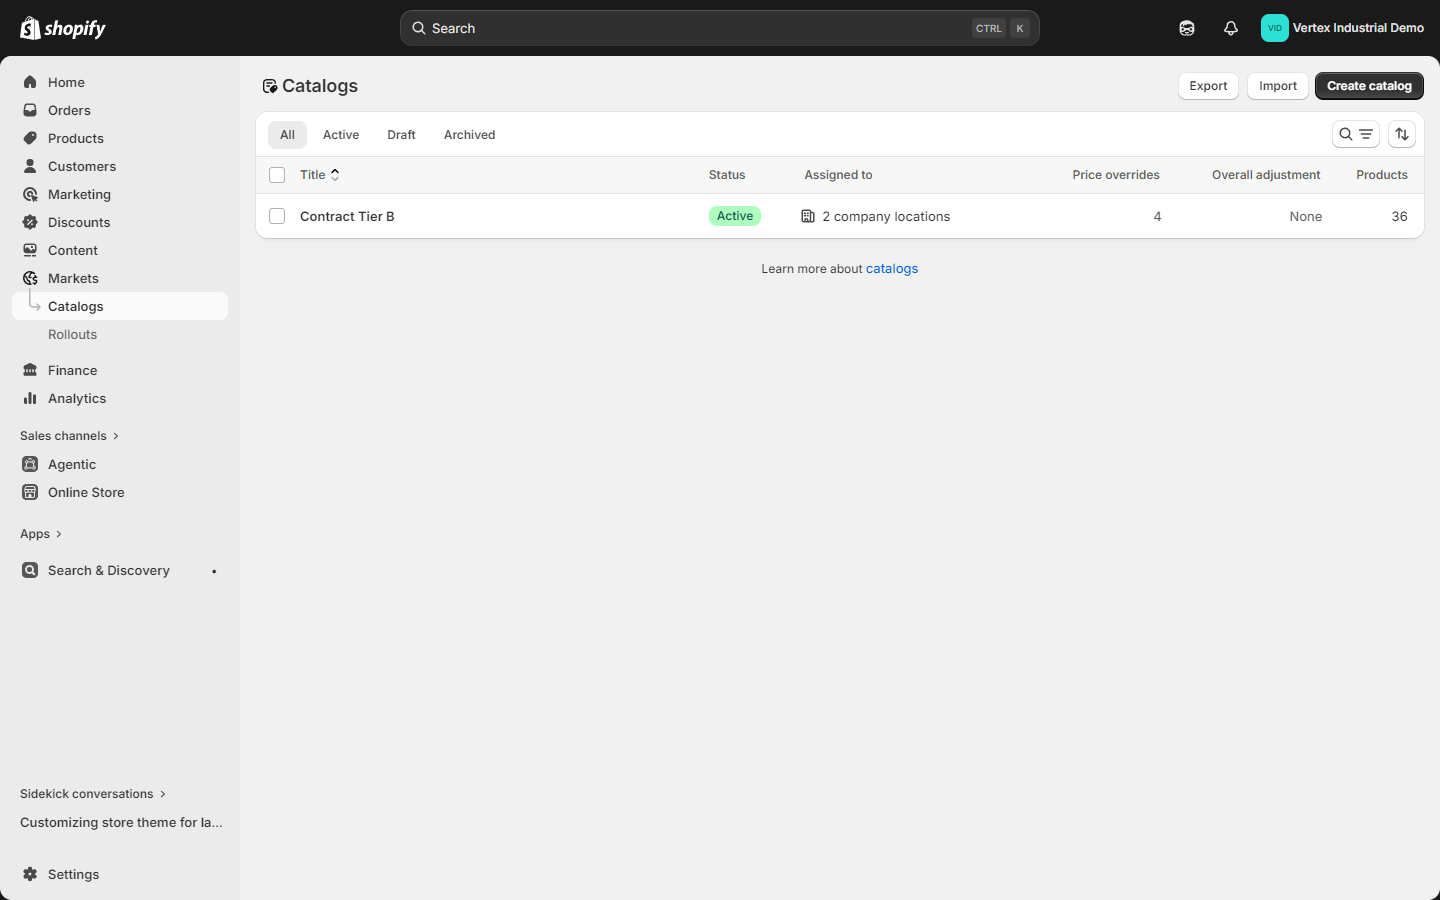
Step 5 — Create a B2B catalog
A catalog is Shopify's container for everything B2B-specific about pricing — which products are visible to the company, what prices they pay, what volume tiers apply, and what quantity rules (MOQ, max, increment) enforce on each variant.
- From the admin sidebar, go to Products ▸ Catalogs.
- Click Add catalog (top right).
- Pick B2B catalog (not Markets catalog).
- Fill in:
- Catalog name — internal label. Example: Contract Tier B — Distributors.
- Products — pick which products this catalog exposes. You can include the whole store, a smart collection, or a hand-picked list.
- Click Save.
Click path: Products ▸ Catalogs ▸ Add catalog ▸ B2B catalog ▸ Save
Step 6 — Add a price list with volume tiers
Now attach a price list to the catalog. This defines the actual B2B prices buyers pay — including volume tiers that drive the volume pricing table on the product page.
- From the catalog page, click Add price list (or Price list ▸ Manage).
- Pick a strategy:
- Percentage discount off all products — e.g., 15% off retail across the entire catalog.
- Fixed prices per product/variant — explicit B2B prices, ignoring the retail price.
- Mixed — percentage default, with overrides for specific products.
- For volume pricing tiers, edit each product or variant and add quantity break rows. Example for a 12-pack item:
| Quantity | Price per unit |
|---|---|
| 1+ | $14.50 |
| 12+ | $13.80 (5% off) |
| 48+ | $13.05 (10% off) |
| 144+ | $12.32 (15% off) |
These tiers render as the Volume pricing table directly above the Add to cart button on the product page, and as a tier indicator on each line in the cart and the bulk-order page.
-
For quantity rules, set per product or variant:
- Minimum — MOQ (e.g., 12).
- Maximum — cap per order (e.g., 1,440).
- Increment — case-pack step (e.g., 12).
Vertex enforces these on the product page quantity stepper, on every cart line, and on the bulk-order page. Invalid quantities disable Add to cart and show inline messaging like "Order in increments of 12. Try 24 or 36."
-
Save.
A common gotcha: volume pricing must be set inside the catalog's price list. Setting volume pricing on the product itself in Products ▸ Pricing will NOT carry into B2B. Always edit volume tiers from the catalog page.
Step 7 — Assign the catalog to the company
The catalog now exists but isn't yet wired to your buyers. Assign it.
- From the catalog page, scroll to Customers.
- Click Add customers.
- Search for the company you created in step 2.
- Click Add.
- Save.
Click path: Catalog page ▸ Customers ▸ Add customers ▸ pick company ▸ Add
Now any buyer signed in as that company sees:
- Only products included in the catalog (others are hidden from listings).
- Catalog prices (not retail prices).
- Volume tiers and quantity rules enforced everywhere.
Step 8 — Set payment terms (NET-30 / NET-60 / NET-90)
If the company has deferred-payment terms — NET-30, NET-60, NET-90, fixed date, etc. — set them at the company level. Vertex auto-detects this and shows a NET terms badge in the cobalt-blue greeting bar and at the cart.
- Go back to the company page (Customers ▸ Companies ▸ [company]).
- Scroll to Payment terms.
- Click Set up payment terms.
- Pick the template:
- Receipt — payment due on order placement (default for retail).
- Net 7 / 15 / 30 / 45 / 60 / 90 — payment due N days after invoice.
- Fixed date — payment due on a specific calendar date.
- Save.
Click path: Company page ▸ Payment terms ▸ Set up payment terms ▸ pick template ▸ Save
Shopify will now allow this company to check out without an immediate card charge. The buyer (and your AR team) sees the NET term clearly at every step.
The NET-terms badge Vertex shows in the greeting bar and on the account screens is driven by the vertex.payment_terms company metafield — set it to "NET 30" (or custom wording like "NET 30 — Pay by invoice") under Customers ▸ Companies ▸ [company] ▸ Metafields. It's separate from the checkout payment terms you set above, so set both. See the Metafield setup guide.
Step 9 — (Optional) Mark the company tax-exempt
If the company is tax-exempt — resellers with a resale certificate, government buyers, qualifying non-profits — toggle off tax charging at the company level. Vertex shows a Tax exempt badge on the product page, cart, and account dashboard.
- From the company page, scroll to Tax settings.
- Toggle Charge taxes to off.
- (Recommended) Upload the buyer's tax-exemption certificate as a Note attachment.
- Save.
Click path: Company page ▸ Tax settings ▸ Charge taxes: off ▸ Save
Shopify skips tax calculation on every order placed by this company. Vertex also displays the badge so the buyer can see at a glance that they're correctly exempt.
Step 10 — (Optional) Fill in sales rep details
If you assign a named sales rep or account manager to each company, Vertex can render a sales rep pill in the desktop header and a full rep card at the bottom of the mobile drawer, with click-to-email and click-to-call links.
The rep is set per company as metafields. Open Customers ▸ Companies ▸ [company] ▸ Metafields and fill in:
vertex.rep_name— e.g. Sarah Chenvertex.rep_email— e.g. [email protected]vertex.rep_phone— e.g. +1-555-0142
Save. The rep details now show automatically when a buyer from that company is signed in. See the Metafield setup guide for defining the fields once under Settings ▸ Custom data.
If you leave the rep settings blank, the rep pill simply doesn't render — no error, no broken layout, no placeholder. The card just isn't there.
Step 11 — Test the buyer experience
Open your storefront in an incognito window (so you're not signed in as the merchant) and sign in as the buyer you added in step 4. Run through this verify checklist:
- Cobalt-blue B2B greeting bar appears above the header, showing the company name, NET terms badge (e.g., NET 30), and — if applicable — the Tax exempt badge.
- Ship-to switcher renders in the greeting bar (desktop) and mobile drawer if the company has 2+ locations.
- Sales rep pill appears in the desktop header (if you filled in the rep metafields).
- Product page shows a volume pricing table above Add to cart with the tiers you configured in step 6.
- Product page quantity stepper enforces MOQ and increment — try entering a quantity below MOQ and confirm Add to cart disables with an inline message.
- Cart shows the NET-30 badge in the order summary.
- Bulk-order page — paste-to-cart respects quantity rules and catalog scoping.
- Account dashboard shows company info, payment terms, quick reorder, and the rep card.
- Catalog scoping — try visiting a product NOT in the catalog by URL. It should 404 or hide.
Common gotchas and fixes
If something isn't rendering, work through this list.
"The cobalt-blue greeting bar isn't showing"
- Storefront mode is set to B2C-only. Open Customize ▸ Theme settings ▸ B2B ▸ Storefront mode. Switch to Hybrid (recommended) or B2B-only. See the Storefront modes guide.
- Buyer isn't actually B2B. Open the buyer's customer record in admin and confirm they're linked to a company. If not, redo step 4.
- Page was cached. Hard-refresh (Cmd/Ctrl + Shift + R).
"Volume pricing table isn't rendering on the product page"
- No catalog assigned to the company. Redo step 7.
- Volume tiers set on the product, not in the catalog. Volume pricing is per-catalog, not per-product. Edit tiers from the catalog page.
- Product isn't in the catalog. Confirm the product is included in the catalog's product list.
- Prices are hidden for guests. The volume table follows the same gate as prices — if Theme settings ▸ B2B ▸ Hide prices until customer logs in is on, the table is suppressed until the buyer signs in. (There is no separate "show volume pricing table" toggle — the table appears automatically whenever the variant has volume tiers.)
"MOQ isn't enforcing"
- Quantity rule not set. Catalog ▸ pick the variant ▸ set Minimum / Maximum / Increment. Save.
- Browser cache. Hard-refresh after editing the rule.
"NET-30 badge isn't showing"
- Payment terms not set on the company. Redo step 8.
- Buyer not signed in. The badge only shows for signed-in B2B buyers — that's by design.
"Rep pill isn't rendering in the header"
- Rep metafields are empty. Open Customers ▸ Companies ▸ [company] ▸ Metafields and fill in
vertex.rep_nameplus at least one ofvertex.rep_emailorvertex.rep_phone. - Window width is below 1170px. The pill collapses to the mobile drawer's account section on smaller screens — open the drawer and scroll to the bottom.
"Tax exemption badge isn't showing"
- Company Charge taxes is still on. Redo step 9.
"Buyer can see retail prices instead of catalog prices"
- Catalog isn't assigned to the company. Redo step 7.
- The catalog's price list is empty. Catalog ▸ Price list ▸ Manage. Add prices.
Where each B2B feature shows up
Once configured, here's where each B2B feature surfaces in Vertex:
| Feature | Where it renders | How it's controlled |
|---|---|---|
| Cobalt-blue B2B greeting bar | Above the main header (desktop + mobile drawer) | Auto (shows for signed-in B2B buyers; hidden in B2C-only mode) |
| Company name + badges | Inside the greeting bar | Auto |
| Ship-to location switcher | Greeting bar (desktop) + drawer (mobile) | Auto (shows when the company has 2+ locations) |
| Sales rep pill | Desktop header + mobile drawer footer | Auto (when vertex.rep_* company metafields are filled) |
| Volume pricing table | Product page, above Add to cart | Auto (when the variant has volume tiers; gated by Hide prices until customer logs in) |
| Quantity rule enforcement | Product page stepper + cart line + bulk-order page | Auto |
| NET-terms badge | Greeting bar + cart summary + account dashboard | vertex.payment_terms company metafield |
| Tax-exempt badge | Greeting bar + cart summary + account dashboard | Auto (native company tax status) |
| Bulk-order page | /pages/bulk-order | Auto |
| Request a Quote page | /pages/rfq | Auto |
| B2B-aware account dashboard | /account | Auto |
| Catalog scoping (only catalog products visible) | Collections, search, product page | Native Shopify |
For per-setting documentation, see the Theme settings reference.
What's next
- Metafield setup guide → — Fill in the
vertexmetafields that drive product specs, documents, and the per-company sales rep card. - Storefront modes guide → — Pick the right Hybrid / B2B-only / B2C-only mode for your business.
- Theme settings reference → — Every B2B-related toggle in the customizer.
- FAQ + troubleshooting → — Top buyer-facing questions answered.
- Shopify's official native B2B docs — help.shopify.com/manual/b2b